In the last 23 moths we have been working on and off, on our bungalow. Some of these photos have been published previously but are reused to show the differences from June 2016 to present.
 |
| This was it as we bought it. The only think that has changed in this picture is the grass in now completely paved over. |
The problems we had with the bungalow were mainly that it needed updating but the big problem was the lack of any proper heating. The electric storage radiators were simply rubbish and gave off their heat during the day and were cold in the evening when most needed.
The bungalow had already been extended on four occasions so some of the layout was a bit mixed up. Like the 3rd bedroom or study door being into the kitchen.
The main tasks we set ourselves were to overhaul the electrics, install a central heating system and renew the bathroom and Kitchen.
One sort of problem we had was that the deceased previous owner had OCD (Obsessive compulsive Disorder). This was told to my by his son who we bought the bungalow of off. For example: now that we have finished the work we have counted a total of about 140 13A sockets throughout the property. There were 10 in the loft, 14 in the garage, 8 in the sheds/outhouses and 16 in the study.
Bathroom, Electrics and Plumbing.
The first job to get tackled was the bathroom. This included installation of a new hot water tank and an electric boiler. The job started with he removal of the storage radiators and an overhaul of the electricity cupboard. The old system had a special electricity meter that provided electicity to one specific board that connected to the radiators. this had to be replaced with one for the new boiler. At the same time completely new and up to current specifications, main board needed installing.
 |
| This is what we started out with. All old fuses and quite simply, a mess. |
 | |
| This what we have now, clean, tidy, modern and safe. Top fuse box is for the central heating. |
 |
| Old and cream with lots of disabled aids. |
 |
| The other end of the bath. The wall with the rail has got to go. |
 |
| New shower to be placed where this toilet and shower are following removal of the part of the wall behind the toilet. |
 | |
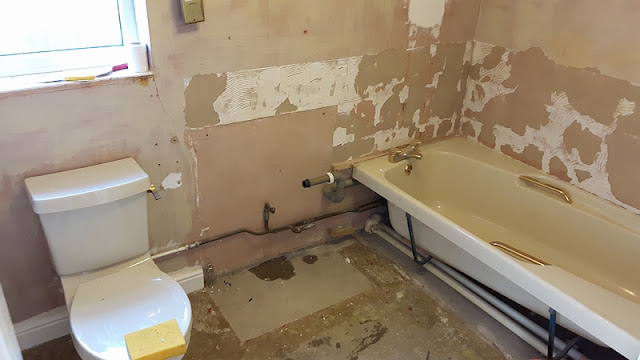
| The rip out has started. This toilet was the next to go. |
 |
| In front of this 'floating' (is that a good word to use in these circumstances ?) toilet a dividing wall was to be placed to cordon off the new boiler/airing cupboard. |
 |
| Main bathroom are finished. |
 |
| New shower room on right and a waterproof TV at the end of the bath., just for Karen's long soaks. A new wall has been inserted. It's the one far right with the coloured tiles on. |
The property initially had a 15mm pipe from the main supply tap. On investigation, I found that the supply to the house was a blue 1" pipe. So I upgraded all supply pipework to 22mm and therfore more than doubled the potential water supply to the house. I stuck a pressure gauge on one of the pipes and found that I had 2.2bar pressure. Enough to put in a pressurised cylinder and remove the old tank in the loft.
It was like a dream come true. The original shower had a pump to make it half usefull and now that was no longer required.
This is the system that I put in. It was a bit of a learning curve but, with the exception of the boiler, I had done most of it in my previous house. My cousin John, who is a plumber, put me on to this system. Thanks to you John.
 |
| The new system. The long white box on the left is the boiler. It is like a seriously powerful vertical immersion heater. |
And to finish the job off:
 |
| Removable shelving installed to make it into an airing cupboard. Karen is happy. |
Next job was to sort out the study or what could be used as bedroom 3. The problem was, with the first extension being placed on the back of the bungalow, it included the rear door to the house. This ended up being the door to the study. We could not progress with the kitchen unlill the door was moved. We thought the best thing to do was to seal the door up and make a new one into the living room. It had to be better than the kitchen. Not ideal, but better. This was the real problem:
 | |
| The study with everything built in including the desk. The door into the kitchen was the big problem. |
 | |
| Looking the other way at some of the 16 sockets. It was an electricians nightmare. |
We punched a hole through the wall into the living room and bricked up the doorway into the kitchen.
When finished and bare. this is what it looked like.
 |
| The radiator is where the original door was. |
The Conservatory.
Due to the need to punch a hole in the rear of the house for a back door into our conservatory that was the next logical job to do. We had to get our neighbours views on the build as it exceeded the normal permitted development but no complaints were made so we bought a 4.5 x 3.5m kit conservatory.
Prior to this we had submitted plans to convert a small link room connecting the house to the garage into an en-suite for the main bedroom. Whilst the plans were awaiting approval, we changed our minds and used the drawings for the conservatory approval.
We started with a blank wall and a large patio area. This lended itself to building a steel framed floor model as it was easy to build upon.
 |
| The blank canvas for the conservatory. |
 |
| When it turned up is was huge and daunting. |
 |
| Once the floor was in, it was time to put the walls up. |
 |
| Now finished. It was a bitch doing the roof, especially as the glass roof panels were huge and heavy. |
 |
| Nearly done. The very last job I did on the whole bungalow was to finish the conservatory skirt off. |
 |
| And this is what it is like now. |
Living Room
With the two holes into the living room now done, it was time it get on it.
As can be seen from the original photos, there was nothing actually wrong with the room. It was just old. On top of this, all the walls in the bungalow had embossed wallpaper that all had to come off and be scrubbed down for painting.
 |
| The living room showing the storage radiators. The room past the sockets on the left is the first extension. |
This is what it looks like now with the two new doorways into the study and conservatory.
 |
| And.... Karen doing a jigsaw on the dining table. |
 |
| Old, old, old and more old. |
 |
| We like this much better. |
Hallway.
With the living room done, it was the turn of the hallway. This is without a doubt the weirdest room in the house and was the last extension to be put on. It was called a 'Sun room' on the planning application and that is exactly what it is. We considered making it into another bedroom but it has far too much glass and would entail bricking up one wall. We decided against it but it is still a waste of space in reality.
 |
| The hallway (or Sunroom) with some of its 13 sockets shown. |
 |
| This is it now. Still a waste of space. |
 |
| But looking the other way, Karen has put her stamp on it. A New York, central park mural. |
The Bedrooms
The bedrooms were the last to be done. It involved removing most of the built in cupboards and installing sliding wardrobes and an en-site toilet.
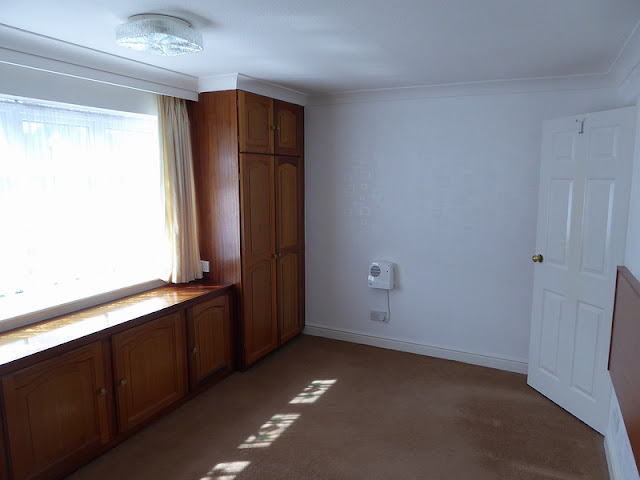
The second bedroom was done first. It started out like this:
And ended up like this.
The main bedroom was a bit more tricky. Due to the way the coving went around the built in wardrobes. We needed to get the ceiling re-skimmed.
Same view as above (almost).
Looking the other way.
This shows the en-suite we installed in the corner. The porthole was taken off of a real sunken ship by my good friend Bob. The toilet is attached to a macerator and is pumped over the ceiling and down to the bath outlet.
The Outside.
The last job to be done (ish).
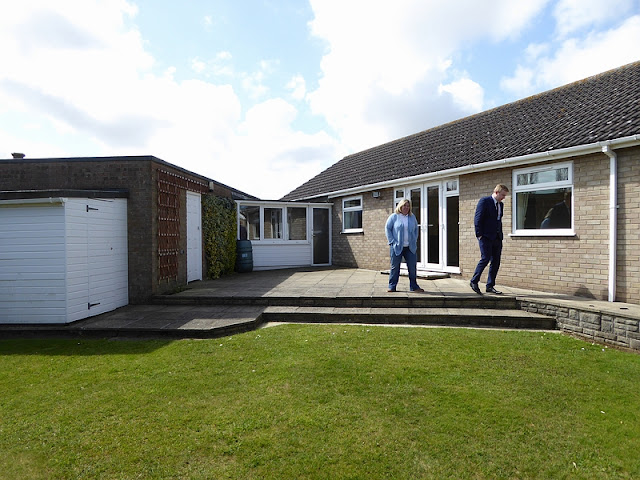
This was the patio area outside the living room.
And a slightly different angle from the same spot.
Little has changed on the patio (nor will it !) but we use it as a breakfast area as the sun hits it in the morning. The conservatory has now taken pride of place and much of the foliage removed to open up the view into the garden. Oh, and shed load of plants.
The summer house was getting crowded out by the trees next to it, so.....
...they had to go. This has made the garden feel so much larger and allowed a large wooden deck to be placed outside it. The lawn has been graded as it had a hump and a sump and is now one grade and no longer floods. Oh and 2 new paths. Sadly the stones are 24" apart as per all the gardening books but would be more comfortable for a dwarf to use.
 |
| We now have a very nice evening sun-downer deck that gets the sun all the way to the horizon. |
 |
| Oh, and more plants. Lots of plants. |


No comments:
Post a Comment